


Views: 0 Author: Site Editor Publish Time: 2026-09-08 Origin: Site


The aesthetic appeal and cost-saving benefits of natural rock finishes make them a top choice for modern architectural projects. Unfortunately, poor installation instantly negates these advantages and compromises the entire design. Improper substrate preparation and incorrect adhesive selection pose massive risks to your build. These common mistakes lead directly to panel delamination, severe moisture ingress, and voided manufacturer warranties. We must execute the foundational steps correctly to ensure lasting durability.
This guide provides an evidence-based, step-by-step framework to achieve flawless results. You will learn how to install these advanced materials properly to meet rigorous commercial and high-end residential standards. By following this protocol, you can eliminate guesswork and protect your work. Proper technique guarantees a stunning, resilient finish.
Substrate integrity dictates lifespan; surfaces must be plumb, dry, and free of contaminants.
Adhesive selection must match the specific environment (e.g., polyurethane for general use, epoxy for wet/exterior).
Precise templating and proper cutting tools prevent material waste and edge fraying.
Sealing is mandatory for wet or exterior applications to prevent stone face delamination and staining.
A successful installation always begins long before the first panel touches the wall. You must evaluate the existing wall structure thoroughly. We define success by checking the load-bearing capacity, testing moisture levels, and reviewing thermal exposure.
Every substrate demands a distinct preparation strategy. Ignoring these specific needs is a common mistake. You cannot treat drywall exactly like concrete. A high-quality flexible stone installation relies entirely on the structural integrity beneath it.
We must prepare the target surface correctly to ensure a permanent bond. Different materials require different approaches:
Drywall and Plywood: These porous surfaces pull moisture out of adhesives too quickly. They require a standard primer. Priming seals the pores and creates a uniform bonding layer.
Concrete and Masonry: New concrete must cure completely. A standard curing time is 28 days. You must also seal masonry to prevent efflorescence. Mineral salts will ruin adhesion if they migrate to the surface.
Existing Tile: You can apply new panels over old tile. However, you must degloss the shiny tile surface first. You must also fill and level the grout lines. This prevents the old grid pattern from telegraphing through the new finish.
Substrate Type | Required Preparation | Primary Risk Factor |
|---|---|---|
Standard Drywall | Apply PVA or acrylic primer. Allow to dry. | Excessive adhesive absorption. |
Poured Concrete | Cure fully. Grind away high spots. Seal surface. | Alkalinity and efflorescence block adhesion. |
Existing Ceramic Tile | Sand to degloss. Skim-coat grout joints flat. | Grout line telegraphing and poor grip. |
Having the right tools on hand prevents costly delays. Do not substitute specialized items for basic household tools. You will need the following arsenal:
A high-grab, flexible construction adhesive. We recommend Polyurethane or MS Polymer formulas for most environments.
A V-notch trowel. You must size the notches according to your substrate texture. Rougher walls need deeper notches.
A hard rubber roller. This tool is non-negotiable. It applies the uniform pressure required for a tight bond.
Masking tape, precise leveling lasers, and tile spacers.
Material waste destroys project budgets quickly. You must mitigate this risk through careful planning. We strongly emphasize creating exact templates before you cut any real material.
Use stiff paper or cardboard to craft your templates. Cardboard mimics the rigid behavior of the actual panels better than thin paper. Trace complex cuts carefully. Outlets, plumbing fixtures, and lighting boxes require precise measurements. Once you perfect the cardboard template, transfer the design onto your lightweight flexible stone sheet.
Using the wrong blade damages the material and frays the edges. Match your cutting tool to the thickness of the panel and the complexity of the shape.
Straight Cuts: You can cut thin veneers easily. Use heavy-duty shears or sharp tin snips. Alternatively, use a heavy-duty utility knife. Score the resin back deeply. Then, snap the panel along the line.
Complex Cuts and Thicker Panels: Do not use snips on thick materials. They will chip the edges. Instead, utilize a small angle grinder. Equip it with a continuous rim diamond blade. This setup slices through the mineral layer cleanly. It prevents edge chipping entirely.
Pay close attention to ambient temperatures. Avoid extreme bending of the material in cold environments. Low temperatures stiffen the fiberglass backing. Forcing a tight curve in the cold will cause micro-cracking in the real stone veneer face. If working in a cold climate, let the panels acclimate inside a heated room for 24 hours before handling.
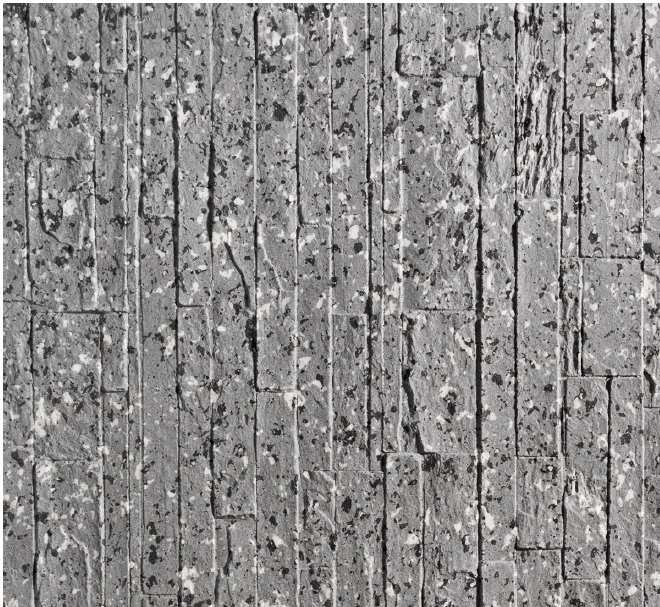
Execution requires patience and strict adherence to protocol. Skipping steps will compromise the structural grip. Follow this four-step process to guarantee success.
Never apply adhesive blindly. Establish a perfect, level starting line using a laser level. Once you mark the wall, perform a dry layout. Dry-fit the panels on the floor first. This allows you to map out color variations properly. Natural materials vary in shade. You want to ensure veining continuity and a balanced aesthetic across the entire wall.
Adhesive application dictates the longevity of your project. You must achieve 100% coverage to prevent hollow spots and hidden air pockets.
You can apply adhesive directly onto the substrate using a V-notch trowel. Keep the trowel ridges uniform. Alternatively, use the back-buttering technique. Apply adhesive to the back of the panel itself. Back-buttering works exceptionally well for uneven substrates. Sometimes, combining both methods yields the most secure bond.
Carefully pick up the prepared material. Position the flexible stone wall panel precisely along your level line. Press it into the adhesive bed gently by hand at first. Make sure the alignment remains perfectly straight.
Next, use your hard rubber roller. Start in the absolute center of the panel. Roll outward firmly toward the edges. Apply consistent, heavy pressure. This rolling action pushes trapped air outward and creates a vacuum-tight grip between the resin back and the adhesive.
Seams require tight control. Use high-quality painters' tape to hold tight seams in place. The tape prevents slipping during the initial adhesive cure time. Leave the tape on until the adhesive firms up.
You will likely see some adhesive extrude from the joints. Clean this extruded adhesive immediately. Use an appropriate solvent recommended by the adhesive manufacturer. Do not let it dry on the natural rock face. Dried adhesive is incredibly difficult to remove and ruins the visual finish.
Corners and columns distinguish professional jobs from amateur attempts. The material behaves uniquely under tension. You must evaluate your approach to every architectural feature carefully.
Wall intersections require specific detailing. We handle internal and external corners differently.
External Corners: You have two professional options here. The best method involves miter cutting the resin backing. You cut a V-groove into the back. You do not cut the stone face itself. This allows you to fold the panel around the corner seamlessly. If that proves too difficult, you can install metal or color-matched flush trim molding.
Internal Corners: Buildings settle over time. Do not overlap panels tightly in internal corners. Instead, use a butt-joint. Leave a small gap. Fill this gap using a highly flexible, color-matched architectural sealant. This sealant accommodates structural settling without cracking the stone.
Wrapping columns presents a unique challenge. When applying a bendable flexible stone panel over a curved column, manipulate the material gently. Use a heat gun on low, controlled settings. Warm the back of the panel evenly. This safely softens the fiberglass and resin backing. It increases pliability significantly without fracturing the delicate stone face.
Do not force a cold panel around a tight radius. The material possesses structural memory. If you bend it aggressively without heat, it will fight the curve. This tension causes the panel to pull away from the adhesive bed over time. Heat the panel, secure it firmly, and tape it securely while the adhesive cures completely.
The final phase locks in the durability of your work. Raw stone remains vulnerable to moisture, oils, and environmental pollutants. You must treat it correctly to ensure longevity.
You must consider the final environment. For wet areas like showers and kitchen backsplashes, the material needs defense. Exterior facades face harsh weather and UV rays. Because the stone face is naturally porous, it requires robust protection. Unsealed surfaces will absorb water rapidly.
Selecting the right chemical sealer makes a massive difference. We strongly recommend high-quality, penetrating stone sealers. You can choose matte finishes for a natural look. Alternatively, use color-enhancing sealers to deepen the rock tones.
Avoid topical film-forming sealers entirely. Film-forming sealers sit on top of the rock. They can trap moisture behind the finish. Over time, trapped moisture causes the sealer to peel, turn yellow, and fail.
Some designs call for distinct grout joints. If installing with a grout joint, skip standard cement grouts. They crack under slight wall movements. Instead, use epoxy or urethane grout. These advanced grouts offer superior flexibility and ultimate stain resistance.
Always mask the panel edges carefully before grouting. The rocky texture catches excess grout easily. Tape prevents a permanent resin-haze from staining the textured stone surface. Peel the tape away immediately after shaping the grout lines.
A flawless installation relies heavily on a strict, methodical approach. The critical path to a failure-free outcome includes meticulous substrate preparation, selecting the proper adhesive, applying uniform pressure, and sealing the final surface. Ignoring any of these phases guarantees complications. Diligence ensures an impeccable aesthetic.
Always base your shortlisting logic on the environment. Evaluate the specific conditions of the project space. Assess moisture levels, temperature swings, and UV exposure carefully before finalizing your adhesive and sealer choices. A bathroom requires vastly different chemistry than a dry living room accent wall.
Before you begin your next project, take action. Direct your team to review the specific manufacturer specification sheets. Order physical samples to conduct small-scale adhesion testing on your actual walls. Furthermore, consult with a technical representative directly for high-risk applications, such as submerged areas or extreme exterior climates. Proper planning guarantees spectacular results.
A: Yes, provided the tiles are securely attached. You must thoroughly degrease the old surface first. Additionally, you must skim-coat the grout lines flat. This ensures 100% surface contact between the new panel and the wall.
A: You should use high-grade epoxy or specific exterior-rated MS polymer adhesives. These heavy-duty formulas successfully withstand intense thermal expansion, daily UV exposure, and brutal freeze-thaw cycles without losing their grip.
A: Flexible stone itself is highly water-resistant. However, it does not replace a primary waterproofing membrane. In wet environments like showers, you must still apply a liquid-applied or sheet waterproofing membrane behind the panels to meet building codes.


